
[ad_1]
Imagine animating as fast as playing a video game, with character control at your fingertips. For example, you’re tapping hotkeys, gliding your mouse, and your character moves seamlessly, almost as if by magic. Add facial motion capture, and now your own expressions bring your animated character to life. It sounds unreal, right? Well, with the new Cartoon Animator 5.3 update, that’s exactly what can be done.
To learn more about this new feature, animator/director/educator Mark Diaz walks readers through the process of using Cartoon Animator to create a livestream using an interactive animated character. Let’s hand it over to Mark now:
Quick Character Creation
For a super-fast setup, I grab a pre-made character from Social Buddies.
Now, Social Buddies is a paid product, but no worries — you can follow along using any of the free characters that come with a fresh installation of Cartoon Animator. For my character, though, I’ll be using Social Buddies and choosing “Harry” as the starting point.

I then switch to Composer mode and launch the character in Photoshop. Once in Photoshop, I quickly create the eyeglasses in fast-forward. Then, I select one eye, locate it in the Layers panel, and position the eyeglasses layer above the eye.

I repeat the same process with the other lens. To ensure Cartoon Animator recognizes the eyeglasses, I place them in a folder named after the layer.
Next, I remove the hair and draw the beard. I prefer to separate the beard into three layers: center, side, and the other side. This makes it easier when preparing the 360 head. Next, I recolor the clothes, isolating each body part to ensure it is done correctly.
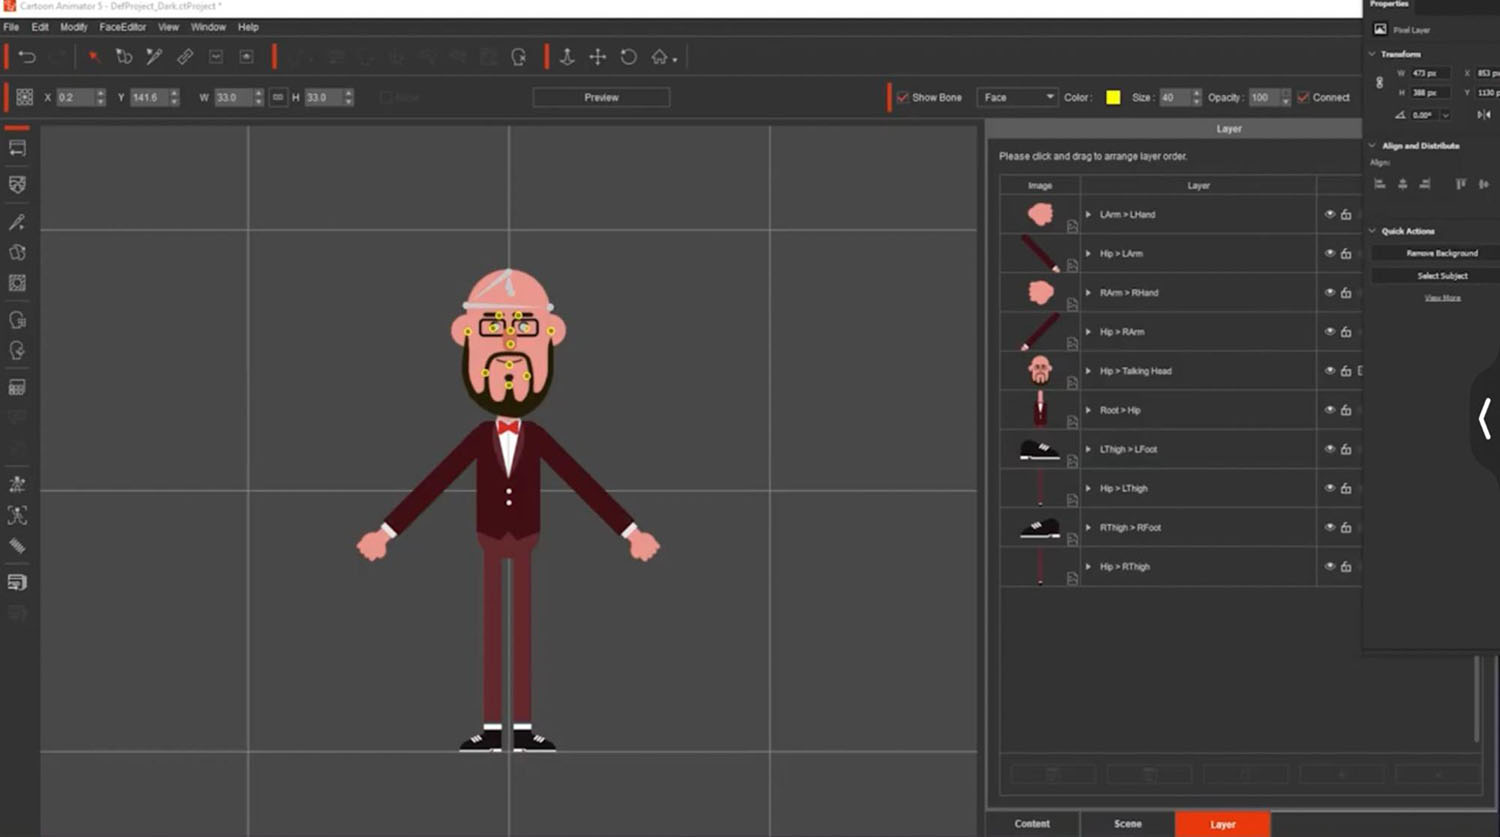
Then, I do the legs and arms. I changed my mind and decided on a darker color for the coat. Next, I colored the shoes, and we’re all done.
Quick Adjustments to the 360 Head
Back in Cartoon Animator, I head into composer mode to set up the 360 head.
First, I adjust the eyeglasses for each angle, ensuring they move seamlessly with the eyes. I carefully go through all 8 points, angle by angle, view by view. After a quick preview, you can see that the eyeglasses now follow the head movements smoothly. Next, I’ll do the same for the beard, using the “Deform” tool to adjust it for each angle. I’ll fast-forward through this part.

Finally, I run a test by clicking “Preview”, then pressing the spacebar and moving the mouse. With everything looking great, the character is officially ready!
Setting up the Scene
Back in Stage mode, I set up the scene by clicking and dragging props from the Content Panel. I navigate to “Item”, then “Props”, and finally “Stage.” From there, I add a background, a podium (sized to 131), and to finish, some curtains.
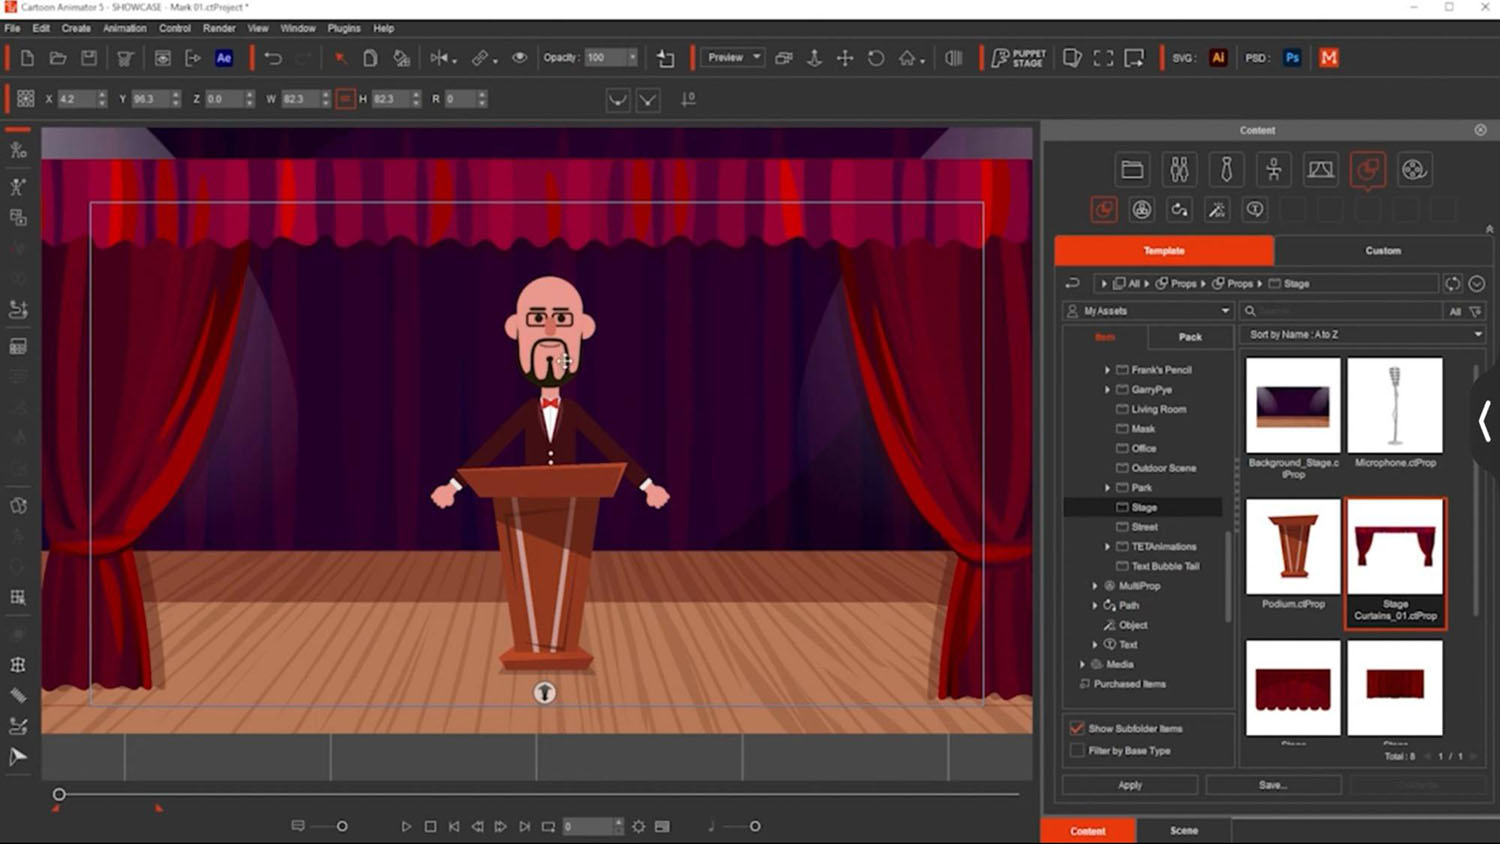
Just like that, the scene is ready to go.
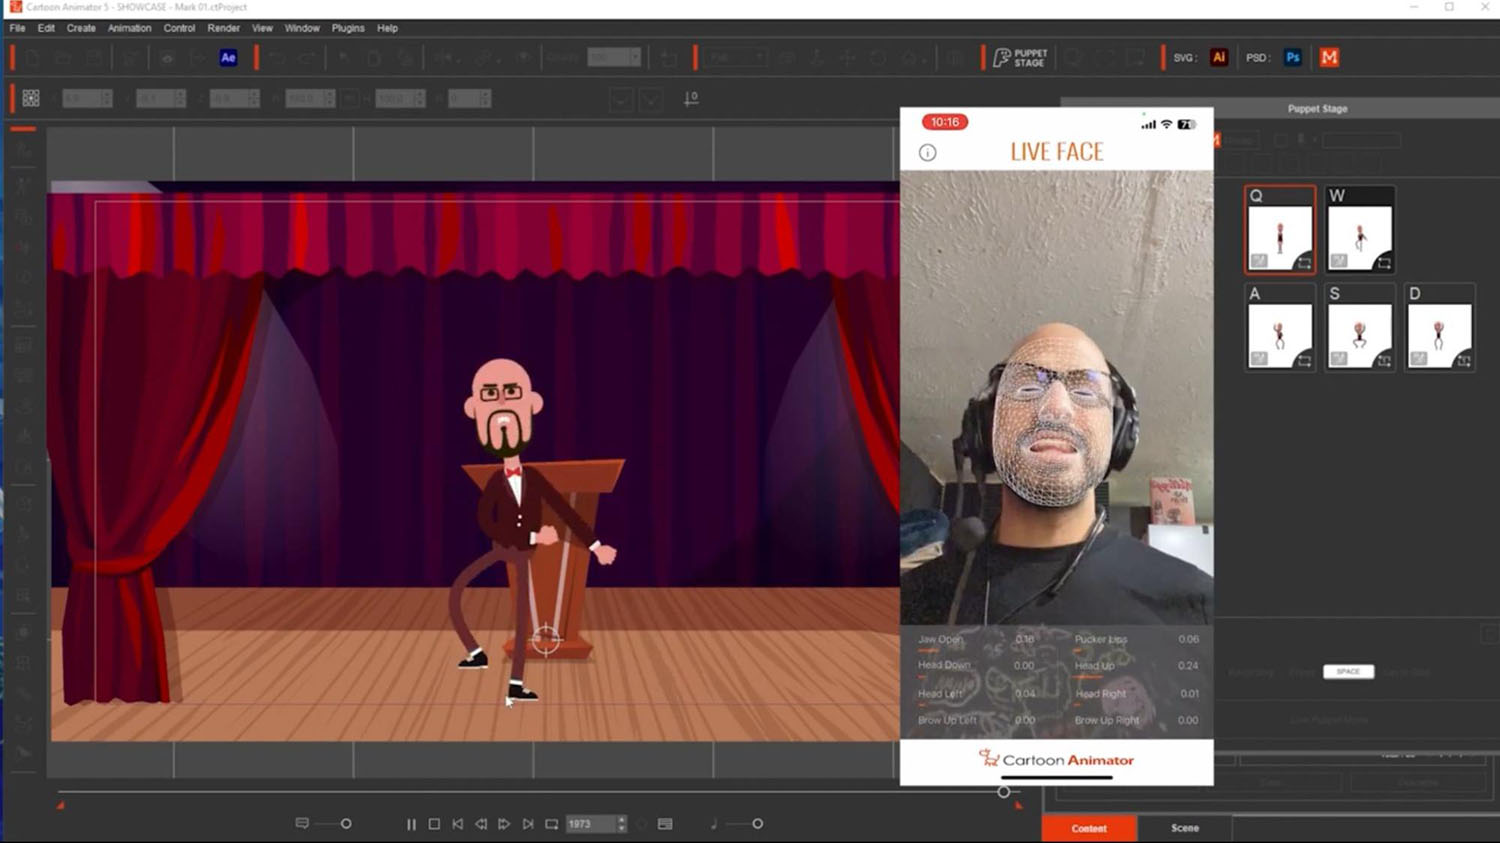
Setting up Facial Motion Capture
For those of you who want to animate quickly with motion capture, you can use Motion Live 2D.

I’m using Live Face on my phone, and to make sure it connects properly to Cartoon Animator, I just need to input the correct IP address.
Setting up Lip Sync
To enhance character performances, I like using automatic lip-sync with voice input. It adds emotion and works smoothly with expression triggers.
Simply enter that number into Motion Live, and as long as both your phone and computer are on the same wi-fi network, it’ll connect seamlessly.

Setting up Puppet Stage with Customized Clips
To set up the Puppet Stage, all I do is click on the Puppet Stage icon, then drag motion clips from the Content Panel.

You’ll notice there are keyboard shortcuts assigned. When I press Preview and hit the spacebar, I can use those keys to control the character just like playing a game.
By activating the “Loop” function, I can make the character repeat the motion endlessly until I hit another button.
Next, I’ll activate Motion Pilot by checking it on. Then, I adjust a setting by going to Motion, then Face, to prevent the character from flipping when moving the mouse side to side. Now, I click “Preview,” press the spacebar so I can press the shortcut keys and move the mouse to make my character dance around.
Since I want the head animation to be controlled by motion capture, I need to take an extra step. I’ll adjust the motion clips so they don’t animate the head.
Customizing Motion Clips
This part is simple but requires a bit of work. I start by adding a motion clip. In this case, I’m combining two from the Content Panel: Item, 2D Motion, G3 Human, Elastic Folks, and then Idle & Talk. From there, I double-click on “Stand 01” and then “Stand 03.”
Next, I bring up the timeline, make sure the object-related track is activated, and click on “FFD” and “Motion”. For my animation style, I remove the FFD clips by selecting them and pressing the delete key.
To remove the head animation so I can control it with motion capture, I simply right-click on the clip, select “Remove Motion”, and choose “Neck,” “Head,” and “Head_Nub,” then click “Remove.”
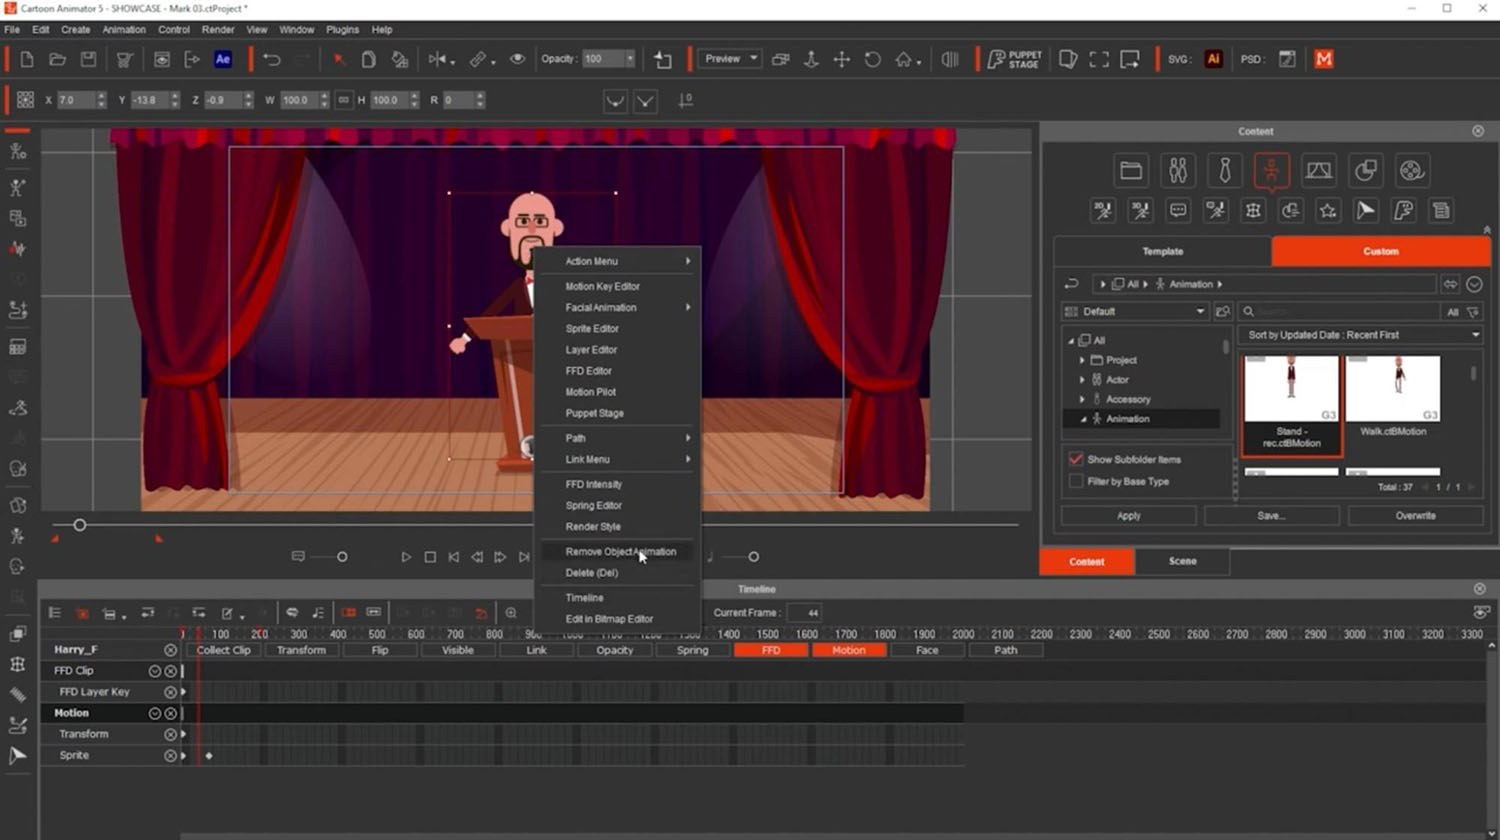
Now, when the clip plays, I’ll be able to control the head using motion capture. To save it, I go to the last frame of the motion clip and click “Set End Frame”, ensuring that the custom clip includes all the animation up to this point.
Then, I open the Content Panel, click “Custom”, select “Animation”, and hit “Save”. If I already have a version created, I’ll simply choose “Overwrite” to update it.
There you go. Now we have a clip that I can activate and control the head with motion capture at the same time. I repeat this process for a couple more motion clips to finish.
Recording Animation in Realtime
Now, it’s time for the fun part — recording the animation. All I have to do is click “Record”, and everything I do from here is captured in real-time.
Here’s how it works:
- I move my face to control the character’s facial expressions.
- I use my mouse to move the character across the screen.
- I hit keyboard shortcuts to make the character perform different actions, like jumping, dancing, and more.
Every movement is recorded live, and in no time, the animation is complete. No delays, no post-editing — everything happens as I’m doing it.
Conclusion
With Cartoon Animator 5, creating animation feels as seamless as playing a game. It’s fast, fun, and best of all, it’s live.
To learn more about how I create a virtual host, here is a detailed walkthrough. If you haven’t tried Cartoon Animator yet, download the free trial and start bringing your characters to life!
[ad_2]
Source link


